Feeds:
Posts
Comments

Cranberry Sauce

cranberrysauceCranberry sauce is not just for Christmas and not just an accompaniment to turkey.  It is wonderful with duck, goose or chicken not to mention soft cheeses like Brie.  My favourite way of eating it is spread generously in a sandwich.  Preferably with chicken or brie  Depending on how you like your cranberry sauce;  sweet or super sweet, it gives the perfect contrast to either.

Cranberries are naturally tart little red/orange fruits that bounce. Beneath their thin red/orange skin is a white firm juicy flesh that contain four roomy seed chambers, it’s the air trapped in these chambers that give them the bounce factor.   Add a little sugar and a little water to a couple of handfuls of cranberries and they are transformed into a tangy zingy fruity thick sauce .

I have always associated cranberry sauce with the USA but in fact they were also grown over here in the UK around the 17th Century but were known as Fenberries, because they were grown in the Fen marsh lands of East Anglia.  Today there is only one British grower and that is Mockbeggar Farm, near Rochester, in Kent.  Unlike in the USA where the Cranberry fields are flooded at harvest time Mockbeggar Farm crops have been so small that they had to picked by hand.

I used to buy cranberry jelly until I found I could make it not only really quickly and simply but also exactly how I liked it.  The sugar quantity I have given below is a good balance – you can either increase or decrease it depending on your taste. I wouldn’t go any lower as it needs to have some sweetness.

ChocMousse (2)

Cranberry Sauce

Makes around two 8 oz jam jars.

Ingredients

300g fresh or frozen cranberries

200g sugar

300ml water

Put water and sugar into a pan and heat gently until sugar has dissolved.  Bring up to the boil and add the cranberries.  As they start to pop and split lower the heat to a gentle simmer for about 10 minutes. Stirring occasionally.  Remove from heat.

The sauce thickens as it cools.

Set aside to cool slightly before pouring into sterilised jars.  Store in the fridge – should keep for a month maybe even longer.


Sterlising Jars

To sterilise the jars wash them in hot soapy water and rinse. Place on a baking tray and put into a warm oven Gas mark 3/325F/160C and leave for 10/15 minutes. Carefully take out and use.

I use the rule that it is either wax discs or screw lid not both. The waxed disc will prevent the twist top from creating a proper seal.


Image Copyright

Copyright (2)

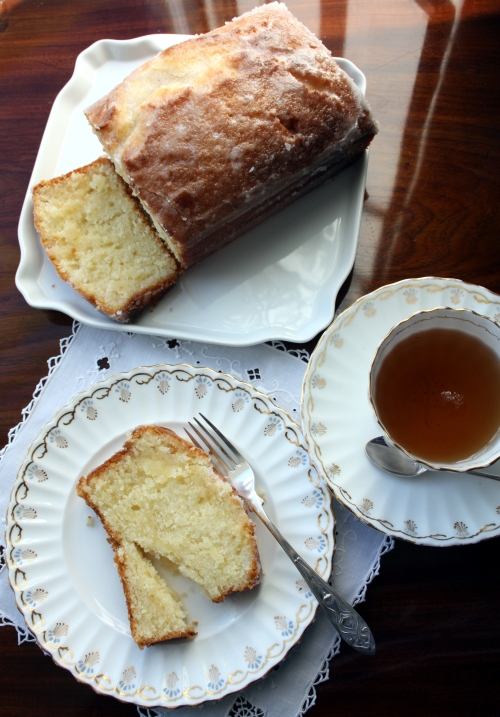
I am sure I am not alone in saying that I take a lot of care and trouble over the photographs used to illustrate the food I write about.  As they say:  you eat with your eyes. I have spent many hours trying to get my photographs ‘just right’ and many tears of frustration because of light, subject matter waiting to be eaten or just that the buttons on the camera are beyond me. Who ever said blogging was easy!

When I first started I would submit pictures to tastespotting or foodgawker – always hopeful of acceptance. On most occasions, and after an agonising wait, my submissions would mostly be rejected with a few cursory words to justify why the required standard had eluded me. So be it – I persevered, but with only modest success, finally to give up totally.

The posts I write the more confident I become in my blog and can live without the approval of these “food porn” sites, nice though it would be. I have taken comfort in certain of my pictures consistently ranking highly when I do a Google search, or a Google image search, as validation that they have a recognised quality and popularity – and that this will, I hope, increase visitors to my site and broaden my readership.

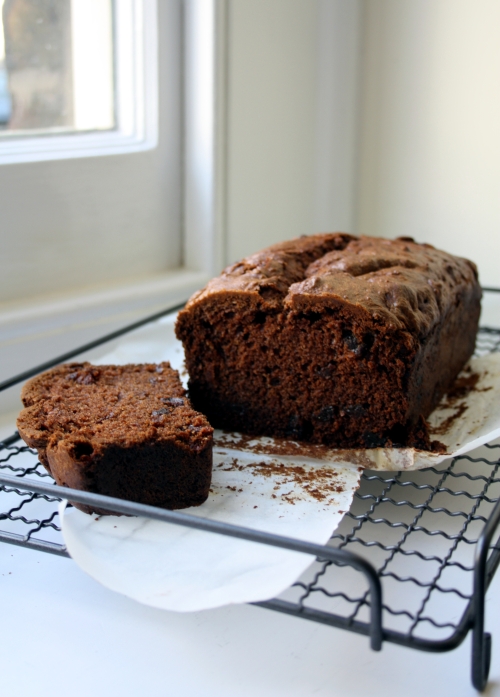
So I was in for a real shock when I realised recently that the pictures of my Christmas cake that appeared high up on Google image searches do not in fact link back to my site!

IMG_1137 - Copy

This is one of the photographs used by two UK companies who had claimed to have baked it.


They linked back to two “reputable” businesses in the UK in order to promote their products and services. Both seemed to claim to have actually baked the cake in question. Shame on them.  This threw up other photographs which I could see were not theirs either.

Some information on copyright:

Firstly the photographer owns copyright in an original photograph. It is created automatically when the photo is taken – there is no need to add © or any date or other information to your picture or website (and even if you do these will be “stripped” by the copyright thief). I also find photographs with a copyright name stamped across them rather a turn off, so I don’t do it.

Secondly, putting a picture on my blog does not waive my copyright. It does not mean that anyone else is allowed to take it and use it themselves – if they do so, then they are committing a civil wrong and possibly also a crime.

Thirdly, if my photograph appears on a Google image search (or on Pinterest etc. etc.) it does not mean that it is available for someone else to use or that I have waived my rights.

Fourthly, if your “web designer” says that it is an “open source” or “public domain” image (which was one of the excuses) then you had better check it yourself – as you are the one responsible and liable.

photo(8)(1)

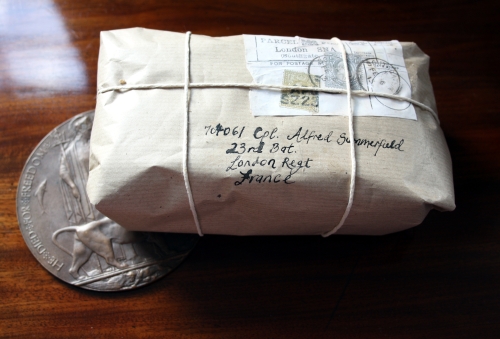
I baked these Koloocheh. The rug and even the dog are mine and therefore is this photograph my copyright? Answer: No, because I didn’t take it.


How to find out if your image is appearing elsewhere?

Searching Google to see if your image has been used is easy. Go to the Google home page and on the top right is a tool bar which includes after gmail the word images. Click on ‘images’ and a new Google search window pops up. In the search box to the far right is a little black camera icon. Click on this. A new window will pop up with two choices ‘Paste URL image’ or ‘upload image’ I tend to click on upload image. I click on browse and double click my chosen image from my computer. Google then does all the hard work and will show all links to places where that image can be found.

Some sites don’t always have email addresses or ways to contact them this is where you can use WHOIS to find the person behind the website.

Email that person. If there is a DMCA link on the website then use that to report the infringement. The prime objective is to get the pictures taken down

Enforcing your rights is not always easy to achieve. Dealing with foreign infringers is problematic as the legal system in their countries will be difficult to access and may be costly to pursue. I am in the UK so dealing with infringers in the UK is easiest. Unfortunately English law is not well advanced in giving realistic damages (unlike the US or Ireland where, apparently, statutory damages can be claimed).

Background reading

A company in the US had to pay $3,000 for using a blurry mobile phone picture without permission.  Apparently the claim was bought by a ‘leech’ lawyer – my thought was, what’s his name and email address?!

You might think that’s the US but here in the UK things are beginning to change.  Claims can be brought on the Small Claims track in court with relatively little cost or formality. You don’t need a solicitor and you can issue a claim yourself.

An example of this is of a photographer who was awarded £10,000 for the use of 19 pictures – and in that same case the Judge made it very clear that ‘ignorance of the copyright ownership is no defence‘.

The photographer wrote a very informative article “How I made £27k from two evenings tracking down copyright infringements”.

Even buying images from a storage locker sale doesn’t mean they are yours either.  Read the story of the copyright issues with Vivian Maier’s photographs.  I had admired her photographs a few years ago and thought that the person who had bought them from a storage locker had a real treasure.  I think he is now the owner of one big legal headache which doesn’t look like it is going to go away anytime soon.

Conclusion

The Internet is here to stay. Copyright issues are unavoidable. To anyone with a website or blog or working in digital media – if you did not take the photographs yourself then you need to be alert to copyright infringement. Otherwise you are at real risk of receiving a claim for compensation. Just as copying photographs is easy, tracking down those who do so is now easy too.

The internet is not going to go away any time soon and copyright theft is going to be pretty big business for legal companies as compensation figures start to rise.


IMG_0809

Steamed puddings have been around for centuries, and can be made as a sponge mixture or with suet.  The cooking is done on top of the stove slowly and gently which makes for a lighter sponge result.  Although they were originally cooked in an animal’s intestine, things have moved on and exceptionally good results can be achieved by steaming the mixture in a pudding basin with a lid.

The basic ingredients for the golden syrup steamed sponge pudding are;  eggs, butter, sugar and flour.  Exactly the same as in a Victoria Sponge.   The only difference is the result.  The slow gentle steam cooking produces the most beautiful, light, moist, airy and delicate sponge.  The added golden syrup gives a luxurious golden crown of a deep sweet flavour.

Unlike the oven which cooks the Victorian Sponge mixture at 190C the sponge pudding is cooked at 100C, this allows all the moisture to be kept in.  I admit to waxing a little lyrical about this pudding but it deserves favour, it really does.  It doesn’t feature at the dinner table that often these days and yet it is a simple and comforting pudding.

The simplicity of this recipe is in the ingredients and the formula – I love recipes with formulae.

Weigh two eggs with shell on and whatever the weight – measure equal weights of flour, sugar and butter and that is the recipe.  The only other ingredients are the crowing glory or the golden syrup and a little milk which is added to the sponge mixture to loosen it to a dropping consistency.  The mixture is put into a buttered pudding basin with the syrup and steamed for 1 1/2 hours.  It can be served with either cream or custard.

Steamed pudding may have been around for centuries but the golden syrup pudding has only been around since 1881.  The recipe was originated by Abram Lyle to promote his ‘goldie’ sales and proved to be incredibly popular in Victorian times.

Abram Lyle was a canny Scotsman who realised that to really succeed he needed to open a sugar refinery in London.  So he sent his sons down to set up a refinery in Plaistow by the river Thames.  Refining cane sugar produced a waste of liquid sucrose but Lyle discovered that instead of throwing it away he could make it into a golden syrup which was known as  ‘goldie’. Later it was to be named Golden Syrup.  Today the factory still remains in Plaistow and produces 20 thousand tons of golden syrup a year.

What makes this syrup even more special is that not only does it have the Royal warrant but the original packaging that Abram Lyle himself designed has not changed, making it the world’s oldest brand packaging.  The only time the packaging changed was during World War 1 when metal was scarce and strong cardboard had to be used.  A product that even with the strange brand label of a dead lion with a swarm of bees has stood the test of time.

Golden Syrup Steamed Pudding

Ingredients

2 eggs

Weight of the 2 eggs in their shell of:

Butter

Caster Sugar

Self raising flour

a little milk (approx couple of tablespoons)

3-6 tbs Lyle’s Golden Syrup

Butter to grease the pudding basin.

Method

Use a little knob of butter to grease the inside of the pudding basin this will help the pudding to turn out easily once cooked.

Depending on your taste drop into the bottom of the pudding basin between 3-6 tablespoons of golden syrup.  (I use 6)

In a bowl beat the butter and sugar until light and fluffy.  Add the egg whole with 1 tablespoon of the flour and beat until combined.  Repeat with the second egg.  Fold in the flour until combined.  Add a little milk and stir in.  The mixture needs to be of a dropping consistency.

Drop the mixture on top of the golden syrup leveling out before placing the lid on. It should come to about half way up the basin.

In a pan place an upturned saucer or a trivet and place the pudding basin on top.  (It must not sit on the bottom of the pan)

Fill the pan with water to at least half way up the side of the pudding basin.  Bring to a gentle boil and then turn down to a simmer and place a pan lid on for 1 1/2 hours.  After this time the sponge should be cooked.  Gently remove and with a knife loosen the pudding from the side of the basin.  Place a plate on top and turn over.  The pudding should come out as one.

Serve immediately with lashings of custard or cream.

Will serve 6 but for a more generous helping it serves 4.  I tend to make it for 2 and the remains are heated up in the microwave the following day.

IMG_5002


Melting Moments

Melting moments

Melting Moments with oats


Melting Moments are biscuits which are very short and as their name suggests melt in the mouth.  Very quick and easy to make and they only requires one egg.  The original recipe from the Be-Ro cookery book calls for half an egg which I think is a bit of a waste, so I add the whole egg.  Oats or coconut can be used to cover the biscuits, but my preference is coconut as that is how I remember them.

They hold the memory of my relationship with Mrs Thomas, the same Mrs Thomas of the Chocolate Victoria Sponge fame. Mrs Thomas was an American married to an eccentric English inventor, and someone I would visit frequently. When I knocked on her door I would never know whether I would be granted entry. Mrs Thomas didn’t greatly care for small children and she wasn’t shy in letting all children know this little fact. She preferred children who knew their manners and how to disappear when their audience with her was over. It may have been tough getting into that circle of two but it was worth it. She was a very good listener and would dole out very good advice to troubled ten year olds.

I would time my visits carefully, usually to coincide with the Thomas’ teatime. On a good day I would be invited to join them in the sitting room for tea and cake. On other days I would only get as far as the kitchen. Here, I would be invited to climb up onto the kitchen stool for a one to one. As they say, there is no such thing as a free lunch and Mrs Thomas would use these times to probe me for information. What had been going on in my household and what grown up gossip had I overheard. Looking back, I think she enjoyed questioning the innocent and getting a honest response free from social etiquette. A raised eyebrow and maybe a chance of a second treat were the only indications that I had hit the mark.

Amongst the treats was a real favourite – Melting Moments. I knew it and Mrs Thomas knew it.  She was not one to pander to small children, so the idea that she would bake them especially for me just because I loved them, was not going to happen. We both knew that. If I hinted at a batch being made then the chances of seeing a single Melting Moment would be dashed. They would appear when I was least expecting them and only when Mrs Thomas chose to make them.

At around this time my pride and joy was a weekend case given to me as a Christmas present. A large navy blue ribbed mock leather affair with a pink silk effect lining. To me it was the height of sophistication. I loved this case, it contained my future and everything that was important to me lived inside. It held everything I thought I needed to be the perfect wife! A small box of brown towels with my initial on them for the bathroom, a felt pencil cover with animal head for making notes, a very fine cotton apron with embroidered birds, a little carved dressing table chair with a pink velvet seat for rings which my future husband would lavish on me and a selection of recipes cut from magazines but to name a few of its contents. Having an extensive range of recipes would propel me to housewife of the year, I had no doubts.
Mrs Thomas would always ask after the case and its contents and listen intently as I enthusiastically relayed my latest acquisitions and my plans for my future perfect married life. Looking back, I don’t think she approved of marriage and always encouraged me to perhaps see my future as an independent woman. At the age of 10 I couldn’t understand how this could ever be possible. Not married? What was she thinking?

She must have eventually seen me as a lost cause because one day when I was a little older, she handed me a folded piece of paper and as I opened it I read the words ‘Melting Moments’ recipe. That was when I felt I had a break through. Perhaps she did like me after all? Perhaps in her own way she was giving me her blessing to (one day) get married.

I kept that recipe in the navy blue vanity case along with the other trifles of rubbish I felt were the vital ingredients to a happy marriage. Over the years it moved around with me and every time I went through the case I would fondly open up the paper and see her handwriting and feel comforted. My times in her company might have been difficult but I really respected her and deep down loved her.

Today I no longer have that vanity case, I don’t know what happened to it, it might have got lost in the endless moves.  What pains me the most is that the recipe is long gone. I have tried to recreate it but there is something missing, perhaps it is the ingredient X that Mrs Thomas added.  I just don’t know and will never know as neither recipe nor Mrs Thomas are around to enquire of anymore.

Melting Moments with coconut

Melting Moments with coconut and natural glace cherries

Melting Moments

Ingredients

150g / 5 oz self raising flour
75g / 3 oz caster sugar
40g /1½ oz lard (if you don’t want to use lard replace this with butter)
65g / 2½ oz butter
1 egg beaten
1 tsp vanilla extract
Desiccated coconut or rolled oats for rolling the biscuits in
Glace cherries for decoration

makes about 20-24

Gas Mark 4/180C/350F

Method

Grease two baking trays with a little butter.
In a bowl beat the butter, lard and sugar until very light and fluffy. Add the beaten egg and vanilla extract.
With a spoon stir in the flour making sure it is well mixed. The mixture will be quite stiff.
Take a small amount (about a teaspoon full) and roll into balls with damp hands. Then roll each ball in the desiccated coconut or rolled oats and place onto the baking tray – leaving a gap between them as they will spread as they cook.
Place a quarter of a glace cherry to each one flattening the ball slightly.
Place in the oven and bake for 10-15 minutes.
They should be golden brown when cooked.

They will be slightly fragile straight out of the oven so wait a few moments and when you are able to handle them move them onto a wire rack to cool.  If they are not all eaten they can be stored in an airtight tin for about 5 days.

N.B.  Lard doesn’t have a very good PR agent which is a shame because if used half and half with butter it will give a more flaky and short pastry/biscuit than all butter.  Another surprising fact is that lard is actually healthier than butter – it contains less saturated fat and is high in monounsaturated fat.  If that is not enough, it is also an excellent natural source of vitamin D.

WW1 Trench Cake

IMG_4914

Trench cake doesn’t have the most appetising name neither does it give a clue to its contents. The name was given to a cake baked during the First World War by loved ones back home to send to soldiers fighting at the front in the trenches, hence the name Trench cake.

This year marks one hundred years since the start of the First World War.  One of the strongest symbols of this is the display of poppies at the Tower of London.  Each poppy signifies the fall of a soldier during the war.  The sea of poppies has grown each week and the final poppy was planted on Armistice Day, 11 November 2014.  A total of 888,246 ceramic poppies.

Each week we have driven past the Tower watching the sea of red poppies grow.  Knowing that each poppy signifies a fallen soldier certainly makes you stop and think.  For me I can’t help but think of my great grandmother (a widow) and her four sons serving in the First World War.  I cannot begin to imagine what her time waiting at home for news would have been like, and to be honest I have never really even considered the notion until now.

I decided to make the Trench cake mainly because I was curious as to how it tasted but also to try and connect in some with all the women and my great grandmother who would have made this cake to send to the front.  In some way I hoped the cake would connect me to hundred years ago.

This recipe does not have any eggs.  So how does it rise?  This process is done by the use of vinegar and bicarb of soda.  The other shocking fact is that the cost of posting this would have been 1 shilling and 7 pence, that is around £6-7 in today’s money.  So sending out four cakes would have been quite costly.  I wonder what Great grandmother did?

I did do some reading of other people making this cake such as Frances Quinn and Greedybots and noted the point of the white specks of flour appearing after baking.  I made sure I rubbed the butter into fine crumbs.  I also used dark brown Muscovado sugar to give the cake a dark appearance for a rich fruit cake appearance.

Tasting the cake was surprising because I wasn’t really expecting anything of any great merit.  I couldn’t detect the vinegar and the overall texture and taste were really good.  The flavour of the ground ginger certainly comes through.  I kept the cake for ten days to see how it would cope.  As the days went past it did become crumblier but still tasted good and lasted.  How it did in the trenches I don’t think we will ever know because no doubt it would have been shared around and so there would be no need to store it.

Having made it and eaten it I have come to the conclusion that had I had four sons at the front I would have probably send them chocolate or something else rather than this cake.  It would be cheaper and no doubt more appreciated.  When you are up to your knees in mud in a trench, breaking off a small piece of chocolate, kept in a pocket would have been far easier than trying to eat a slice of crumbly cake!

IMG_4869

Rub the butter into the flour very well

The mixture ready to be put into the cake tin

The mixture ready to be put into the cake tin

Trench Cake

Ingredients

1/2lb/225g plain flour

4 oz/110g  margarine or butter

3 oz/75g currants

3oz/75g brown sugar (I used Muscovado to give a darker colour)

2 tsp cocoa powder

1/2 tsp nutmeg

1/2 tsp ginger

1/2 tsp grated lemon rind

1/4pt/ 150ml milk

1/2 tsp bicarbonate soda

1 tsp vinegar (white wine or cider)

Method

Turn oven to Gas Mark 4/350F/180C.  Grease a cake tin – I used a 1lb loaf tin.

Rub the butter into the flour in a large bowl forming bread crumbs.

Add to this the rest of the dry ingredients including the lemon rind.

To the milk add the vinegar and bicarbonate of soda and add into the dry ingredients and stir well until everything is combined.  If it is too stiff you can add a drop of milk. You are looking for a dropping constituency.

Put the mixture into the cake tin and place in the middle of the oven.

After about 1 hour 15 mins the cake was cooked.  I tested this by placing a skewer into centre of the cake. If the skewer comes out clean then the cake is cooked.

Allow to cool and then wrap in greaseproof paper and place into a tin or airtight container.


So, what became of those four serving sons.  All returned safe and sound bar one.  Alfred died 2 November 1918, the War ending the 11 November.  He had come home on leave and caught influenza and taken to his bed.  When he didn’t turn up at his unit the Military Police came to the house and arrested him where upon he was put into jail.  Only for a few hours later to be transferred to hospital when they realised how ill he was, but it was too late.  He later died at Edmonton Military Hospital.  His mother was heart broken and never really got over his death. He had signed up on his 17th birthday and died aged 20 having served 3 years for his country.  228,000 people died in Britain from the 1918 influenza pandemic.

IMG_4937(1)

Parcel addressed to a soldier during WW1 containing Trench Cake.

In the picture to the left is Alfred’s ‘dead mans penny’ which were issued to the next of kin for those who served in the War. My hope for the penny is that it will be looked after by future custodians and Alfred will continue to be remembered.

Whilst making the cake I also gave thought to which things I would use – the kitchen table is well over a hundred years old and no doubt would have had an original trench cake made on it, the broken cup used for measuring was my father’s (Alfred’s nephew) special coffee cup, the spoon belonged to Alfred’s brother and the mixing bowl to his niece.  I hope in some way this post honours and remembers him in something we all share – eating!


Lemon Drizzle Cake

Lemon drizzlecake

The radio that sits on the counter in my kitchen is permanently on.  Even when I am out.  I like the comfort that I am never alone.  I can tune in and out at whim.  I don’t have to stop what I am doing, it has become a fixture along with the cooker and sink.  I just let the voices permeate around me as I potter about my business.  There have been times that I have become so captivated by something happening on the radio that I have had to drag the kitchen chair right up against the radio and have sat teacloth in hand glued to the spot listening intently.  There have also been times when I have shouted  at it, and when things have got too heated, marched over and silenced it with one press of the off switch,  but I can never be cross with it for long.  The kettle will go on and the radio will be pressed back into service until the next time when it decides to transmit a load of rubbish that I don’t agree with.

It was on the radio that I first heard of this recipe by Evelyn Rose author of The New Complete International Jewish Cookbook.  Evelyn Rose calls this recipe luscious lemon cake – and luscious it certainly is.  The method of making the cake in a food processor and in such a quick way had me searching for the recipe, and when I found it the result didn’t disappoint either.  The cake is light and sweet, but the lemon syrup that runs through it adds a tart welcome tone.   Rose’s claim is that “This cake will keep moist for as long as any of it remains uneaten” – in reality this cake is usual eaten within the day and has yet to be tested for longevity, but I could see it lasting a good few days in an airtight tin at a push.  I have also found it very popular with men!  I think the slight tartness appeals, as not all men like chocolate cake.

Another reason for making this cake was that I could not resist ordering six Amalfi lemons from Natoora, just as described they are very very juicy and the smell is heavenly. I love the fact that they come with their leaves still attached.

photo 1(12)

Lemon Drizzle Cake
Ingredients
2 large eggs
175g/6 oz sugar
150g/5oz  softened salted butter cut into squares
grated zest of 1 unwaxed lemon
175g/6oz self-raising flour
125ml/4floz  milk
For the lemon syrup:
150g/5oz  icing sugar
50ml/2floz fresh lemon juice
Method
1. Turn oven to Gas mark 4/180C/350F. Line a 9″ loaf tin.
2. Place the eggs and sugar in a food processor and whizz until the eggs and sugar are well blended. Should look like thick cream, now drop a square of the softened butter at a time, as you continue to whizz in the processor. Do this until it is all combined. If your mixture curdles don’t worry, keep the blades going for a couple of minutes and you will see the mixture blend together.
3. Now add the lemon zest whizzing it briefly to mix through.
4. Add the flour and milk giving the mixture brief short whizzes so that all the ingredients blend in and are uniform. Do not be tempted to over beat at this stage.
5. Spoon the mixture into the loaf tin and bake in the oven for 45/50 mins. The cake should be risen and a golden brown and when gently pressed with a finger should rise back.
6. When the cake is cooked remove from the oven and let it stand on a cooling rack. While it is cooling make the lemon syrup. Make the syrup and spoon over while the cake is still warm.
7. Place the icing sugar and lemon juice into a pan and gently warm while stirring. Do not let it boil. The sugar needs to dissolve in the lemon juice and become clear.
8. Now prick all over the top of the cake with a fork or skewer and gently pour the syrup all over the top. Keep the cake in the loaf tin until it has cooled and then remove carefully. The cake is quite fragile and very moist.
Cut into slices.
If you don’t eat it all in one sitting which requires a lot of will power wrap in foil and keep in a air tight tin.

IMG_4707

Pastitsio is the most delicious of comfort foods. It tastes good the day you make it and even better the following day as the flavours have time to marinate. Pastitsio is a classic Greek dish of a meaty sauce sandwiched between soft cheesy pasta layers and topped with a rich velvety creamy béchamel sauce.  It is to Greece what Shepherds Pie is to England. It can be served on its own or with a salad. I just keep it simple with a side helping of grated Parmesan.

I find it hard to have any self control when eating this dish.  Hot, warm or cold straight from the fridge I just cannot resist it.  Every Greek home has their own unique take on the recipe. Starting with the mince – in the north of Greece they use veal while in the south lamb, but goat or pork is fine. This is a recipe you change to suit your own and your family’s tastes and what you have in the cupboard.

The Kefalotyri cheese is not always easy to find in England. It is a hard pale cheese, traditionally made from goat or sheep’s milk with a tangy taste. A good substitute for taste would be a Gruyere but it lacks the hard texture of the Kefalotyri. I tend to replace it with Romano or Parmesan. Failing that I will use whatever hard cheeses I have lurking in the fridge.

My mother liked to mix the pasta and meat all together putting the béchamel over the top. As delicious as it was I much prefer my way, of placing three quarters of the pasta mixed with oil, a little cheese and a couple of spoons of béchamel, a layer of meat and then a layer of the remaining pasta and crowned with the béchamel.

The ultimate I think is to eat it soon after cooking when the béchamel sauce is very soft and oozes over the meat and pasta, but if it is left to stand for 30 minutes it will be easier to cut into neat portions.

Some recipes use the 3 egg whites by binding them into the pasta with the olive oil – I don’t think this lends anything to the overall flavour or appearance and is a bit of a waste. I prefer to set aside my egg whites and use them to make meringues.

Both the Misko Pastitsio Macaroni no. 2 and the Kefalotyri cheese can be bought from the Athenian Grocery shop in Moscow Road, London W2 4BT they also do mail order.  I have been going to this shop since a small child, little has changed over the years which adds to its charm.  I hope it never changes because it works as it is perfectly.

IMG_0352


Pastitsio

makes 8 portions

The Meat Sauce

500g minced lamb (beef, goat, pork can be used instead)
1 large yellow onion finely diced
1 clove of garlic crushed
1 tin of chopped tomatoes
2 tablespoons tomato puree
2 tablespoons olive oil
Salt and pepper to taste
Cinnamon stick
Bay leaf
Glass of red wine (optional)
Oregano

The Pasta

500g Misko Pastitsio Macaroni no. 2 or use the Italian ziti pasta or penne
2 tablespoons Olive oil
25g grated Kefalotyri (or Romano/Parmesan/gruyere cheese if you cannot find Kefalotyri)

The Béchamel Sauce

1 litre full fat milk
110g plain flour
110g salted butter
75g Kefalotyri cheese or Romano/Parmesan
3 egg yolks beaten
A little ground nutmeg
Salt and pepper

Oven 180-200C

Meat Sauce

Heat the 2 tablespoons of olive oil in a pan and sauté the onions until soft add the garlic and then the meat. Break down the mince with the back of the spoon, as it cooks it will crumble down. You want to achieve an even crumble of mince.

Add the tomatoes, cinnamon stick, oregano, bay leaf and simmer gently until the meat has absorbed the juice, about 30-40 minutes. Stir the meat from time to time so that it doesn’t stick. After cooking remove the cinnamon stick and bay leave.
Béchamel sauce

Melt the butter in a pan and then add the flour stirring well. Cook the flour and butter through for a few minutes. Add the warmed milk a bit at a time stirring the sauce well, if the sauce thickens too quickly remove from the heat and continue to beat, once smooth return to the heat and add the rest of the milk.

Add the cheese, seasoning and nutmeg if using. Allow to cool slightly before adding the beaten egg yolks. If the eggs are added when the sauce is too hot there is a chance of curdling them. Give the béchamel sauce a good stir until a smooth constituency is reached.

Pasta

Bring a large saucepan of salted water to the boil and drop the pasta in. Cook for 7 mins. Drain and rinse under cold water. The pasta has a habit of retaining water because of the hollow tubes so give the sieve a good shake to make sure the water is drained.

Return the pasta to the pan and add the olive oil, stir and coating the pasta. This stops the pasta from sticking to itself. Add the grated cheese and a large spoon of the béchamel sauce and stir in.

Assembly of Pastitsio

Grease an ovenproof dish and put two thirds of the pasta in. Add all the meat leveling it out. Put the rest of the pasta over the top again leveling it and on top on this pour the béchamel sauce. Sprinkle some extra cheese on the top and place into the oven. Cook for 40-50 minutes. It is ready when the top has risen and is a golden brown colour.

Remove from the oven and leave to stand for about 30 minutes. This will allow the Pastitsio to set so that when it is served it will keep its shape on the plate.

Pastitsio will also keep well in the fridge and can be microwaved when portioned up.  It is not the same as reheating in the oven but as I have said this is one comfort food I can eat any way!


Blackberry Jam/Jelly

photo(166)

As the nights draw in and the last of the August sun lingers into the early days of September the blackberry bushes finally yield their fruit. The tight little beads of white berries turn to red and then finally swell to a deep dark purple. I watch these changes as I walk the dog.   I return to the same spots each year in the hope of cornering the best pickings before everyone else.

My special spot is high up on common ground overlooking the sea.  Amongst the long dried grass and to the side of downtrodden grass paths can be found large clumps of bramble bushes.  As the years have passed my pickings have become slimmer and slimmer, largely due to foraging becoming more popular. Last year it was difficult to collect enough to do anything worthwhile, so this year I decided not to bother.

That was until I helped Sally take a chair back to her beach hut.  When we got there she realised she had left the keys in the car, so I was asked to watch the chair (in case someone decided it was abandoned and took it home) while she returned to her car to get them.

I stood there looking out to sea; there were no ships to spy, and nothing to see so I soon became bored. The sun was quite strong, so I decided to move to behind the beach hut and stand in the shade, and that is when I made the discovery.   Behind the huts lies a steep wasteland, as I scanned across the long grassy bank I spotted what I thought was a large dark mass of ripe blackberries – surely not. I left the chair and went to get a closer look. As I gingerly scrambled up the slope I could see not only one heavily laden bush but also a whole mass of them. Deep rich purple berries glistening in the sun. There was evidence that someone had earlier this season visited and trodden down paths around the bushes and, judging by the weight of the blackberries on the bushes, had not returned.

Beachut

This is not Sally’s hut. I am keeping that location quiet for now!

I went back to minding the chair, thinking how could I have missed this rich seam over the years. I concluded that the rows of beach huts shield the area from the front and the steepness of the bank shields the view from above. I have now marked this as my new spot.  The minute I was relieved from chair minding I raced back home to grab some containers and gloves. An hour later I was back home relaxing with a cup of tea in my hand and a container of 4lbs of blackberries I had collected.  These juicy little berries were going to be turned into blackberry jelly, as I hate the little irritating seeds that get stuck between the teeth found in jam.

Blackberries are picked in England at the end of August and all through September but never after September as ‘the devil spits on them and they are bad’ that is what I was always told.  An old wives tale maybe, but not such a myth because as the weather becomes colder and wetter the berries can be infected by toxic molds.

It doesn’t matter how many blackberries you have, as with most things cookery it is all to do with the formula. Put blackberries in a large pan with enough water to cover them and lemon juice.  Blackberries are not endowed with masses of pectin so this is where the lemon juice helps.  Simmer for about one hour and strain. The juice is measured and then balanced with sugar, taken back to the heat to boil to setting point, and then bottled.

photo 1

Blackberries with water to cover


Blackberry Jelly

Ingredients

4 lbs blackberries
2 Lemons – juice of,  pips as well
Enough water to cover the blackberries
Sugar granulated (1lb sugar to 1lb of strained juice)
Large pan or preserving pan
Jelly bag or a couple of layers of muslin lining a sieve.

Clean sterilised glass jam jars. (see below)

Method

1. Wash the fruit and pick out any obvious stalks and rotten fruit
2. Place into the preserving pan with the lemons juice and pips  just covering with water
3. Bring to the boil and then simmer for about 1 hour
4. Using a wooden spoon or potato masher break the fruit down as much as possible
5. Let the liquid cool a little – this is not for any reason other than it stops yourself being scalded if you spill any.
6. Strain through a jelly bag and allow to drip through until it dries up. I leave mine overnight.
7. Measure the juice produced and pour back into the cleaned preserving pan. Bring gently back to a gentle boil and add the sugar:

For every pint of juice you will add 1 lb of granulated sugar.

What is left in the jellybag

What is left in the jellybag

Add the sugar a bit at a time.  Stir, you don’t want the sugar sitting on the bottom of the pan and catching.
Once all the sugar has been added stir and gently bring up to the boil.
Using a thermometer boil until jam temperature is reached and set has been tested.  When set is achieved.  Let the pan sit and cool for 10 minutes and then pour into sterlised jars (see below).  Label.

photo 3

The jelly reaching setting point. As you can see the liquid rises quite a bit so its a good idea to have a large pan or preserving pan.

The Set

Don’t just rely on the thermometer reading, the jelly still needs to be tested for set.  Place a small plate into the freezer and leave for 10 minutes and then drop a little jelly onto it and leave for a couple of minutes to cool. Now push your finger through the jam.  It should wrinkle and not flood back.  You want the jelly to be thick enough that the path remains.  If the jelly is not set then bring the preserving pan back onto the heat for another five minutes or so and test again.

Blackberry jelly does not set like other jams it has a much looser set. Once set it will wobble rather than sit solid in the jar.  It also takes quite a while to cool down so best to leave it until the following day before eating.

Makes 7 jars

Sterlising Jars

To sterilise the jars wash them in hot soapy water and rinse. Place on a baking tray and put into a warm oven Gas mark 3/325F/160C and leave for 10/15 minutes. Carefully take out and use.

I use the rule that it is either wax discs or screw lid not both. The waxed disc will prevent the twist top from creating a proper seal.

Remember to label and date. I like to keep a jar from the previous year so I can compare tastes.

Briam / Μπριάμ

P1040563 - edited

Briam is a traditional Greek vegetable dish that is eaten as a main course.  One that everyone has their own way of doing.  My mother’s version was cooked in a large pan on the hob.  Requests for the Briam to be baked in the oven were refused by her in fear that the added heat in the kitchen would result in her expiring.  Queen and drama are two words that come to mind.  It didn’t really matter though because the on the hob version was delicious and there were clean plates all round.

Every day late in the afternoon after a hard day’s swimming in the sea we would come back home, shower, change and sit down at the table in time for a huge bowl of Briam to appear, accompanied by a large slice of white Feta.  Not forgetting the wicker basket filled with freshly baked bread, sliced in big clumsy chunks, which was used to soak up the last of the Briam sauce lingering on the plate and any stray Feta crumbs.  Afterwards I always commended myself on eating such a healthy meal of course ignoring or choosing to forget the half loaf of bread I had eaten and very generous chunk of Feta.

My mother’s version would include courgettes, baby aubergines, onion, green or red pepper and tomatoes.  Other recipes call for the inclusion of potatoes.  Different herbs are used such as parsley or dill.  My preference is a generous handful of oregano just like my mother’s version.

I find that this dish is a fabulous way of using up the last bits of vegetables lurking in the fridge.  The ones that are too small an amount to do anything worthwhile with.  Today I didn’t have potatoes but if I had I would have included them.  Instead I used up the courgettes and onions.  I only had one red onion so I used two white ones as well to make up the quantities.  The peppers I had were orange and yellow and the cherry tomatoes were an addition that I don’t usually use but were excess from yesterday’s salad.

The on the hob version that my mother made was delicious and the flavours sang out but here in England the vegetables don’t all have that intense taste so I feel that frying the vegetables first and then baking gives a more intense flavour making up for their lack of sweetness.  They are no hard and fast rules to this dish if you don’t like courgettes leave them out just add more peppers or potato.  The basics of this recipe is olive oil for frying and the chopped tomatoes or this can even be substituted with passata.  I have used baby aubergines in this recipe but if you use a large aubergine just slice them into rounds.

Briam

Ingredients

3 small onions sliced thinly

3 cloves garlic either sliced or crushed

2 peppers de-seeded and sliced

8 small baby aubergines sliced lenthways or sliced in rounds if using a large aubergine

2 courgettes chopped into large chunks

12 cherry tomatoes whole

1 tin chopped tomatoes

salt and pepper

Olive oil for frying

Oregano

Method

Turn the oven on to Gas mark 7/220C.

Heat some olive oil in pan and add the aubergines.  Sauté, turning them over until they have softened and started to colour. Remove and put into a large baking dish.

Add to the pan a little more oil if the aubergines have absorbed it all.  Put in the onions and garlic and sauté  until softened and just starting to colour.   Add  the peppers and sauté  until the peppers just start to soften.

Then add the onions and peppers to the aubergines in the baking dish. 

Put the courgettes into the frying pan and quickly turn them over.  When they have caught some colour place into the baking dish.

Add to the baking dish the tinned chopped tomatoes, salt and pepper, cherry tomatoes and salt and pepper.  Depending on your taste at this point I add a very generous amount of oregano.  With your hands gently mix all the ingredients together.

Place into the oven at Gas mark 7/220C for 30 minutes and then turn down to Gas mark 6/200 for a further 20 minutes. watching that the top of the Briam does not catch and burn too much.

Remove from the oven and leave to stand for about 5 minutes.  Serve, with bread and a large piece of Feta.

We tend to eat it lukewarm with pitta bread and Feta.  Sometimes the Feta supply only stretches to a thin slice,  when this happens I just crumble what Feta I have over the top of the Briam.  The Feta gives the Briam a tangy salty note taking the whole dish to another level.


Baked Figs

The last of this year’s figs are now all gone, all that remains is a small bowl of  fives figs left to ripen on the windowsill. This summer there has been a race to see who got to the figs first, the blackbirds or me. There were two particularly crafty blackbirds who would sit either in the fig tree or just above it watching and waiting for the fruit to ripen. If I approached they would fly off in a huff squawking loudly at me, only to settle on a tree or bush nearby so that they could spy what I was up to. Willing me not to touch their fig tree.

Netting the tree was out of the question I had tried that before but it didn’t matter how careful I was, one of the blackbirds always managed to get themselves trapped inside. So I gave up with the netting in fear of having a feathered fatality on my conscious.

I resorted to being on constant vigil, if I saw a blackbird land on the tree I would rush out and run down the garden only to find a fig had ripened between my inspections and there to my irritation would be a large pecked hole in the otherwise perfect fig. There were the times I beat the blackbirds to it and I cannot tell you how triumphant I felt as I walked back to the house holding a ripe fig with not a beak mark in sight. This summer they have managed to eat all my raspberries and gooseberries not to mention stripping the red currant bush clean.

Now, I don’t know which I prefer the fresh off the tree sweet firm flesh of the fig or the baked soft sweet slightly flavoured with cinnamon variety. These baked delights are delicious served with soft cheese. The honey in the recipe was something I wondered if I could do without, as the figs are naturally sweet.  How wrong I was, the honey during cooking soaks through the figs and produces a thick and sweet sauce, which can be spooned over the figs when served. The cinnamon adds an extra note and to my mind is a personal preference.

I have put 2 to 4 teaspoons of honey in the recipe because even though 4 teaspoons sounds excessive it will not sit on the figs but create a sauce at the bottom of the dish.

This recipe is so simple.

Baked Figs

Ingredients

5 figs washed or as many as you have.

2 or 4 tsp honey

Cinnamon

Method

Turn oven to Gas mark 4/180C/350F

Cut the figs in half and place upturned in a baking dish, choose a dish that allows the figs to be placed closely together so they don’t move around too much during cooking.

Pour over the honey and add a pinch of cinnamon to each fig.

Place in the oven and leave for 10 minutes. Check by just squeezing the figs to see if they have soften, if not leave in the oven for another 10 minutes. Remove. Turn out onto a dish and serve. They can be eaten straight from the oven or cooled at room temperature.