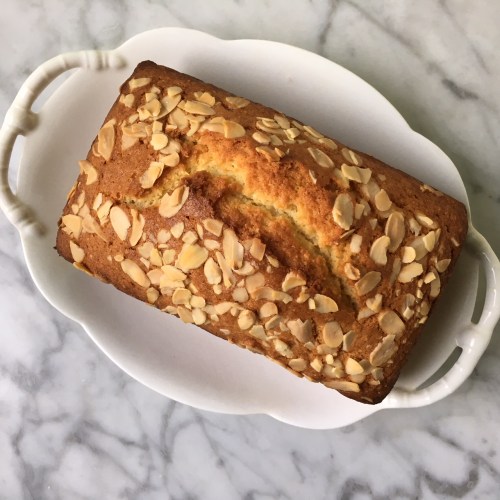
Feeds:
Posts
Comments

Posts Tagged ‘baking’

img_8016

Blueberry Muffins

Muffins.  What can I say about them, except – carefully peel away their paper cases to reveal the soft fluffy sponge of the muffin, and eat, let the sponge melt in the mouth and enjoy the sensation of juicy fruity hits of blueberries.  To me that is just about the right balance for the perfect muffin.  Homemade muffins are a world, an entire world, away from ones bought in supermarkets.

Muffins are not something I have ever had a yearning to bake.  I have only eaten them from coffee shops or when I have been tempted at the supermarket, only to regret it as soon as they have been packed into my shopping bag.  I have found them to be a heavy, dense sponge, unsubtly flavoured with either fruit, chocolate or cheese.

Until I had a small crop of homegrown blueberries to use I hadn’t given the muffin any thought.  This year my kitchen garden list was extended to include a few of what I call exotics.  One of these being blueberry bushes.  I followed the growing instructions to the letter, mixing up a cocktail of soils and making sure they were comfortably bedded and watered.  I had visions of endless crops of  super little blue berries and concerns of what I was going to do with this endless supply.

As the months passed, I would wander up the garden to check on them.  Eventually, I saw progress with the appearance of tiny little buds of promise.  I realise now that I wasn’t the only one who had noticed this, and like me were waiting with excitement for their ripening.

Early one morning as I looked down the garden while standing at the kitchen sink, I could see in the far distance that my blueberries where ready to eat. How?  because someone else was busy helping themselves, gobbling down those ripe blue berries as fast as they could. I flew out of the door and down the garden.  The blackbirds who have been keen to keep an eye on my garden had realised that the berries were now ripe for the picking.

They had been busy in my garden all summer helping out by getting rid of anything fruity and edible, but this time they were not going to get their beaks on my berries, not this time.  They had already stripped me of the redcurrants and the strawberries, not to mention the figs.

It upsets me to say that they  feasted on not only on a couple of my figs but a whole tree full (not a single one was left). To add insult to injury the number of figs was too great for my resident two, so they felt the need to invite a cloud of friends to help finish off the fruit.  At times the tree would shake and tremble as they fought over a particularly juicy fig. Whilst all the while all I could do was watch from the kitchen sink, vowing that next year the tree would be netted.

I wasn’t letting them have the blueberries.  A netted structure was set up. I watched from the kitchen sink as they bounced up and down on my netted enclosure,  whilst holding on tight to the netting with their beaks trying as hard as they could to free a small hole, but nothing budged. Those remaining blueberries were mine, all mine.  Admittedly, my reward was only a small crop of 150g of blueberries not counting the amount the blackbirds had already had, but it was enough for something.

As I looked through my cookery books for a recipe worthy of my little haul I kept finding that I was constantly just coming up short on the quantity that was needed.  Eventually I reluctantly resolved that the only answer would be blueberry muffins.  I consoled myself that it would be better a muffin than wasting my little crop.  Thanks to the blackbirds I am now a huge fan of muffins.

Notes on the recipe

Muffin cases are not essential when making these, you can grease and flour a muffin/cupcake tray but it does make life so much easier.

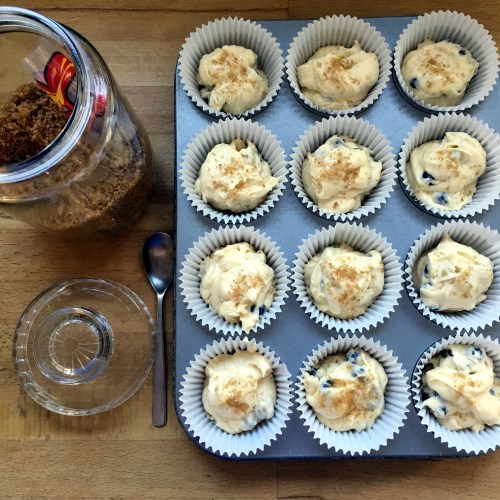
I have added to the recipe demerara sugar but haven’t given any quantities, this is because you can either leave it out completely or put as much as you like over the tops before baking.  It’s down to personal choice.  I love the crunchy texture it creates and I feel the muffins get an added dimension.

img_63161

Blueberry Muffins (makes 12 large muffins)

12 paper muffin cases

115g butter

200g granulated sugar

2 large eggs

1 tsp vanilla extract

2 tsp baking powder

1/4 tsp salt

260g plain flour

120ml milk

150g blueberries (give or take)

Topping (Optional)

Demerara sugar

Method

Turn oven on to gas mark 5/190/375.

Line a 12 hole muffin tin with paper muffin cases.

Put into a mixing bowl the butter and sugar, beat until light and fluffy.

Next add a whole egg and beat until it is well blended into the mixture. Then repeat with the second egg.

Add the vanilla extract, salt and baking powder.

Fold in half of the flour and then half of the milk and repeat.

Gently fold in blueberries.

Spoon the mixture into muffin cases and sprinkle over the top the demerara sugar if liked, the quantity is up to you.

Bake in the centre of the oven for about 20-25 mins, it might take a little longer depending on your oven.  They are ready when they have reached a beautiful golden colour.Cool completely and then store in an airtight container.

 img_8019
Advertisement

Read Full Post »

IMG_2168

It’s been too long since my last post but, I have not stopped cooking.  Life has enveloped me tightly and carried me in a huge wave out to sea.  I am not in calmer waters and have the time to settle back into my previous life.  Well, for the moment.
After so long I would have never have guessed the recipe that would bring me back to writing would be a recipe based on a simple Madeira cake.
I know I am not alone when I tell you I have shelves full of cookery books. Mine have been collected over the decades. A bookcase was built for me that stretches across the entire wall in the sitting room and in return I promised that I would only keep books that fitted on the shelves, with the rule that if a new book came into the house then one had to go. The one in one out rule hasn’t worked, but what has appeared is little mountains of books directly in front of the bookcase.
I am not completely selfish; I do feel pangs of guilt when I add another book to the mountain. My antidote to this guilt has been to take a book each week and use a recipe. This way I felt I was demonstrating how useful all these books could be! I have been experimenting, eating new things, and trying different flavours.
I decided to try a baking book (I am naming no names here) in which the photographs were beautiful, the cakes look delicious, and they tempted me in. I wanted to try the recipes. Note the ‘s’ on recipes. I decided on a hat-trick of baked wonderfulness. All three cakes were very similar, in that they were loaf cakes. I started to make a shopping list of ingredients. That was when the first doubt crept into my head. Did I really need all these different ingredients? I brushed the doubt aside.
As I started to weigh out the ingredients for the first cake it dawned on me that a quarter of the ingredients were unnecessary as the quantities were so small. I ploughed on, making sure I followed the recipe to a tee. When the time was up in the oven and I went to check the cake, I didn’t need to use a skewer to see it was not cooked. Was it me? I went online and did some research – I was not alone with my cake results.
I am disappointed in the recipes and in the book. I feel a little duped. All too often I see recipes that have a fancy name when in fact they are another traditional recipe but instead of actually improving the technique or adding something that would change the recipe for the good, a whole long list of meaningless ingredients have been added just so the writer can claim it as theirs.
My disappointment wasn’t all negative I did take from the cake is that I liked the orange zest flavour and, that the ground almonds gave it a heavier more moist texture. It also made me think about how I could improve it and pushed me to research and create my own recipe, which I wouldn’t have done had it been a good cake. My new recipe is based on a Madeira cake. The orange zest can easily be swapped for lemon zest if you wanted.

N.B:  When making cakes soften butter makes all the difference.

IMG_2160(1)

Orange and Almond Loaf Cake

Ingredients

160g self raising flour

70g ground almonds

pinch of salt

zest from 1 orange

140g butter (soften)

140g caster sugar

3 large eggs

25g milk

15g flaked almonds for decoration

Method

Turn oven on to Gas mark 4/ 350F/180C
Grease and line with baking paper a 3 ½ inch x 7 inch loaf tin.
In a bowl beat with an electric mixer the butter, orange zest and caster sugar.
Beat in each egg separately until well combined.
Add the ground almonds, self raising flour and salt. Using a large spoon fold the dry ingredients in until combined.
Add the milk and mix until combined.
Pour the batter into the prepared tin. Sprinkle the top with the flaked almonds.
Place in the middle of the oven and bake for about 1 ¼ hours. The cake is baked when a skewer inserted into the middle of the loaf comes out clean. If it doesn’t, just give it another five minutes and check again.
Allow to cool on a wire rack in the tin. When cold enough to handle, turn the cake out onto the rack and leave to cool completely.
This cake is best eaten on the day, but will keep for up to 3 days in an airtight container.

IMG_2161


Read Full Post »

pear,chocolate cake

Pear, chocolate and hazelnut cake a combination that tastes delicious. This isn’t a light delicate spongy type of cake. It has more of a robust crumbly texture and there is no mistaking the three key ingredients as they sing out beautifully together.

This is not a recipe that I have made or even tasted before. I came across it on Instagram and more precisely on Daniel Etherington’s feed. There was no recipe link, nothing, just a photo and description. It caught my eye, and more importantly my taste buds. I Googled it and found only a few links to two slightly different recipes.  I had a free Sunday afternoon and the ingredients so decided to follow my desire for pear, chocolate and hazelnut cake.  I read both recipes and the comments left about the too short cooking time and decided to branch out with my own version.

At the time of making the cake I didn’t think to look on Daniel Etherington’s blog for the recipe!  Which I note is again slightly different to the one below.  I also note his oven time is shorter, I am guessing because his recipe calls for a higher oven temperature.

A couple of notes on this recipe;  Firstly, I left the cake in the oven for 1 hour 15 minutes, the original recipes stated 50mins which is far too little – I am not alone on this statement!  I went with experience and after an hour opened the oven to check on the cake.  I could tell that it wasn’t ready to be tested.  I left it for another 15 minutes until I got a light springy resistance when lightly pressed. I then inserted a skewer to check it was done.  Secondly,  I used an extra pear thinly sliced and laid across the top of the cake in a fan as decoration.  Finally, the apricot jam glaze does make a difference, not only to the overall look –  it also gives a slight sweet note.

IMG_5507

The original recipe states conference pears but I don’t think that matters greatly. It can be eaten warm but I preferred it cold, as it wasn’t as crumbly and much easier to cut. I served it with clotted cream, but ice cream would be just as nice.

Pear, Chocolate and Hazelnut Cake

Ingredients

100g roasted hazelnuts
140g self-raising flour
175g butter cut into small pieces
140g caster sugar
2 eggs (lightly beaten)
1 tsp vanilla extract
2 conference pears (peeled, cored and diced small)
50g dark chocolate (cut into small pieces)
Decoration
1 conference pear (peeled and sliced thinly)
1 tablespoon warmed apricot jam (to glaze)

Method

Turn oven on to Gas mark 3/160C.
Grease and line a 20cm round cake tin with baking paper.
Place hazelnuts in a food processor and chop until fairly fine. Add to this all the flour.
Add butter cubes and pulse until crumbs appear, be careful not to over pulse as the crumbs will turn into clumps. Add to this the sugar, slightly beaten eggs and the vanilla extract. Pulse enough to combine.
Stir in chopped pears and chocolate.
Spoon mixture into the lined cake tin, leveling the top with the back of a spoon. Add the thinly sliced pear in a fan design on the top.  Embed the pear slices into the mixture by gently pushing them in.
Place in the oven and leave for 1 hour 15 minutes. Depending on the ripeness of the pears and differences in ovens check after an hour. The cake should have a lovely golden colour.
Remove and allow to cool in its tin for about 10 minutes. Warm up the apricot jam in the microwave and brush over the top of the cake.
Can be eaten warm or cold. Best eaten with a large spoon of cream. Or in my case a generous spoon of clotted cream.

_MG_5521

Before the apricot glaze is brushed on.


N.B It is really worth roasting the hazelnuts as they give a much deeper nuttier taste to this cake.


Read Full Post »

IMG_4914

Trench cake doesn’t have the most appetising name neither does it give a clue to its contents. The name was given to a cake baked during the First World War by loved ones back home to send to soldiers fighting at the front in the trenches, hence the name Trench cake.

This year marks one hundred years since the start of the First World War.  One of the strongest symbols of this is the display of poppies at the Tower of London.  Each poppy signifies the fall of a soldier during the war.  The sea of poppies has grown each week and the final poppy was planted on Armistice Day, 11 November 2014.  A total of 888,246 ceramic poppies.

Each week we have driven past the Tower watching the sea of red poppies grow.  Knowing that each poppy signifies a fallen soldier certainly makes you stop and think.  For me I can’t help but think of my great grandmother (a widow) and her four sons serving in the First World War.  I cannot begin to imagine what her time waiting at home for news would have been like, and to be honest I have never really even considered the notion until now.

I decided to make the Trench cake mainly because I was curious as to how it tasted but also to try and connect in some with all the women and my great grandmother who would have made this cake to send to the front.  In some way I hoped the cake would connect me to hundred years ago.

This recipe does not have any eggs.  So how does it rise?  This process is done by the use of vinegar and bicarb of soda.  The other shocking fact is that the cost of posting this would have been 1 shilling and 7 pence, that is around £6-7 in today’s money.  So sending out four cakes would have been quite costly.  I wonder what Great grandmother did?

I did do some reading of other people making this cake such as Frances Quinn and Greedybots and noted the point of the white specks of flour appearing after baking.  I made sure I rubbed the butter into fine crumbs.  I also used dark brown Muscovado sugar to give the cake a dark appearance for a rich fruit cake appearance.

Tasting the cake was surprising because I wasn’t really expecting anything of any great merit.  I couldn’t detect the vinegar and the overall texture and taste were really good.  The flavour of the ground ginger certainly comes through.  I kept the cake for ten days to see how it would cope.  As the days went past it did become crumblier but still tasted good and lasted.  How it did in the trenches I don’t think we will ever know because no doubt it would have been shared around and so there would be no need to store it.

Having made it and eaten it I have come to the conclusion that had I had four sons at the front I would have probably send them chocolate or something else rather than this cake.  It would be cheaper and no doubt more appreciated.  When you are up to your knees in mud in a trench, breaking off a small piece of chocolate, kept in a pocket would have been far easier than trying to eat a slice of crumbly cake!

IMG_4869

Rub the butter into the flour very well

The mixture ready to be put into the cake tin

The mixture ready to be put into the cake tin

Trench Cake

Ingredients

1/2lb/225g plain flour

4 oz/110g  margarine or butter

3 oz/75g currants

3oz/75g brown sugar (I used Muscovado to give a darker colour)

2 tsp cocoa powder

1/2 tsp nutmeg

1/2 tsp ginger

1/2 tsp grated lemon rind

1/4pt/ 150ml milk

1/2 tsp bicarbonate soda

1 tsp vinegar (white wine or cider)

Method

Turn oven to Gas Mark 4/350F/180C.  Grease a cake tin – I used a 1lb loaf tin.

Rub the butter into the flour in a large bowl forming bread crumbs.

Add to this the rest of the dry ingredients including the lemon rind.

To the milk add the vinegar and bicarbonate of soda and add into the dry ingredients and stir well until everything is combined.  If it is too stiff you can add a drop of milk. You are looking for a dropping constituency.

Put the mixture into the cake tin and place in the middle of the oven.

After about 1 hour 15 mins the cake was cooked.  I tested this by placing a skewer into centre of the cake. If the skewer comes out clean then the cake is cooked.

Allow to cool and then wrap in greaseproof paper and place into a tin or airtight container.


So, what became of those four serving sons.  All returned safe and sound bar one.  Alfred died 2 November 1918, the War ending the 11 November.  He had come home on leave and caught influenza and taken to his bed.  When he didn’t turn up at his unit the Military Police came to the house and arrested him where upon he was put into jail.  Only for a few hours later to be transferred to hospital when they realised how ill he was, but it was too late.  He later died at Edmonton Military Hospital.  His mother was heart broken and never really got over his death. He had signed up on his 17th birthday and died aged 20 having served 3 years for his country.  228,000 people died in Britain from the 1918 influenza pandemic.

IMG_4937(1)

Parcel addressed to a soldier during WW1 containing Trench Cake.

In the picture to the left is Alfred’s ‘dead mans penny’ which were issued to the next of kin for those who served in the War. My hope for the penny is that it will be looked after by future custodians and Alfred will continue to be remembered.

Whilst making the cake I also gave thought to which things I would use – the kitchen table is well over a hundred years old and no doubt would have had an original trench cake made on it, the broken cup used for measuring was my father’s (Alfred’s nephew) special coffee cup, the spoon belonged to Alfred’s brother and the mixing bowl to his niece.  I hope in some way this post honours and remembers him in something we all share – eating!


Read Full Post »

cak

It wasn’t until Kathleen left a comment on one of my previous posts asking for the recipe of the fairy cakes I had mentioned, did I, after a lifetime, realise that what I have always referred to as fairy cakes are in fact butterfly cakes.  Looking at them I can’t believe I ever thought they could be called anything else.  The cake tops are sliced off and cut in half to resemble the wings.

These little cakes are so easy to make and have a smaller margin for failure than a full size, Victoria sponge.   Even though they are made with the same recipe and formula.  Add to this that the vanilla frosting does not have to be piped as in cupcakes,  just applied neatly with a knife, make these perfect for baking with children.  Even if the wings are not precise or the frosting uneven a sprinkling of icing sugar forgives all.  I limited the decoration to a small piece of cherry but there is no end to what you could sprinkle and decorate them with;  chocolate buttons, hundred and thousands or even left plain.

When I made this batch I thought I would tart them up and pipe the frosting.  While I rummaged in my baking drawer to look for the icing nozzles I gave it some thought.   That wasn’t how they used to be made.  They were always slightly rustic with no two being the same, which is what gives them their charm.  As the saying goes ‘if it ain’t broke don’t fit it’ so I have not meddled and made them as I have always known them.  Perhaps, with the only difference being that I have finally got their name right.

I have given a generous recipe for the vanilla frosting.  I either use all of it on the 12 cakes or I am less generous and split it over two batches.  The frosting will keep in the fridge for a day or two if covered tightly with cling film but will harden so needs to be left out while the cakes are cooking to soften up.

There are two problems with these.  Firstly,  just one is never enough and secondly how to hide the pile of empty paper cases sitting in front of you.

Butterfly Cakes

makes 12

Ingredients

4 oz/110g butter softened

4 oz/110g caster sugar

2 eggs

4 oz/110g self raising flour

3/4 glace cherries for decoration cut into quarters

12 Paper cases

Turn oven to 190C/350F/Gas 4

In a bowl beat softened butter and caster sugar until pale.  Add one egg and beat.  If the mixture begins to curdle add a tablespoon from the measured self raising flour and beat until smooth.  Add second egg and mix well.  Fold in flour.  Divide up equally into the 12 paper cases.

For extra support I place my paper cases in a bun tin.

Place in the oven for 20/25 minutes.

They are cooked when a skewer is inserted in the center comes out clean.  They should be a light golden colour.

Leave to cool on a wire rack.

When cool, cut out a disk from each cake with a knife.  This is then cut in half to create the wings.  Place a small amount of vanilla frosting to cover the hole and then gently push the two halves into the icing.  Finish with a small piece of cherry.

Sprinkle with icing sugar.

Keep in an airtight container.

Vanilla frosting

Ingredients

4 oz/110g butter softened

8 oz/225g icing sugar

3 tbs milk

1/2 to 1 tsp vanilla extract

In a bowl mix together the butter and icing sugar until smooth and well combined.  Add the milk and vanilla extract and mix well.

Apply to cakes.

Read Full Post »

DuckeggVicSponge MDDuck egg blue is a beautiful colour, one of my favourites.  I think it stems from years ago when on the May Bank holiday my elder brother would take me to the Surrey County Show.  It was always a fantastic day out and there would be something for everyone.  We particular liked seeing the agricultural side of the event, especially the different show tents that featured poultry, rabbits, flowers, crafts and cooking and we would work our way around all of them.

We gave the poultry section special attention.  Looking back I can’t imagine why he would have had any interest in poultry but it was always on the top of our list.  Inside the canvas tent would sit row upon row of uniformly stacked cages in which sat their feathered occupants showing off their beautiful plumage.  We would walk past silently glancing in and choosing our own winner.  What will always stick in my mind was that one year a small boy was allowed to trouble the birds by tapping their cages and shouting at them. When he got no reaction from a large cockerel he stuck his nose right between the bars of the cage and for his troubles he got a sharp peck.  The last we saw of him was fleeing from the tent.  ‘Just desserts’ come to mind.

At the end of the feathered section would be a stretch of tables filled with plates of exhibition eggs.  They were all arranged beautifully with a small accompanying card describing the breed of bird that had laid the eggs. Their different colours and speckly marks fascinated me.  The ones that really sang to me were the Indian Runner duck eggs.  Their size and shade of blue fed my imagination and I would wonder how they would taste, and longed for one to be soft boiled and served with buttered soldiers.  I then silently vowed to myself that when I grew up I would own my own team of Indian Runner ducks.

I am now all grown up and to date have yet to own a single Indian Runner duck but the desire to own one is still very much there.

This week when I went off to the little small-holding where I buy my chicken eggs I noticed a single box marked ‘duck eggs’.  When I opened the box there sat six beautiful blue eggs.  The chap who looks after the animals came over to me, keen to tell me about the ducks; Indian Runners and that the eggs in my hand where ones no one wanted because they were all odd sizes.  I happily handed over my money, I knew exactly what I was going to use them for.

Duck eggs make beautiful cakes; the sponge is lighter and richer in taste.  Using the duck eggs in a Victoria sponge couldn’t be easier either.  The weight of the butter, flour and sugar is determined by the total weight of the combined eggs.  So you could make a one-egg sponge mixture or a four-egg mixture.  Once the total of the egg (weighed in their shells) is determined then you have the mathematical formula.

Duck Egg Victoria Sponge Cake with Vanilla Butter icing

Ingredients

3 duck eggs weighed with their shells 180g

180g butter softened

180g self raising flour

180g caster sugar

Method

Turn oven to Gas mark 4/180C/350F

In a bowl whip the butter and sugar until pale and light and fluffy.

This is an important step.  This is where you will get the air into the sponge.

Lightly beat the eggs with a fork or similar.

Add the eggs a little at a time to the butter and sugar mixing in between.

You want to make sure you have beaten in all the egg mixture before adding more.

At this stage you also don’t want to over beat the eggs or you will be taking out the air you put in with the previous stage.

If the mixture begins to curdle add a couple of tablespoons of the measured flour and beat until smooth.

When the eggs have all been used up fold in the flour carefully.

Divide into two cake tins.  I used 18cm loose based sandwich tin.

Place in the middle top of the oven not touching the sides or each other and bake for 30 minutes.

N.B.  The baking time is completely determined by your oven.  My way of testing if the sponges are nearly done is smell.   When I can smell the sweet aroma of sponge cake I know they are nearly done.  After 30 minutes I check to see if they are done by pressing with my finger the top of the sponge if it bounces back its done.

Leave to cool in the tins for a few minutes and then turn out onto a wire rack.

While they are cooling make the butter icing.

Vanilla butter cream

Ingredients

225g icing sugar

115g softened butter

2 tablespoons milk

1 teaspoon vanilla extract

In a bowl beat the butter until pale and fluffy add the icing sugar a bit at a time beating on low with an electric mixer.

Add the milk and vanilla extract and beat for a couple of minutes until smooth and cream like.

Spread onto one layer of the cake and then sandwich together with the other layer.

To finish off sprinkle some icing sugar over the top.

N.B.  It is always best to sieve your icing sugar, as little lumps don’t always break up leaving a rather gritty texture to the butter cream.

Read Full Post »

Brioche

Brioche MD (1)

Brioche has to be the Queen of  all the breads, mainly because she has such a light sweet buttery taste,  with two sides – half cake, half bread – and she can be a little difficult to handle when making.   All the same the brioche is worth the effort and hard work and its not just me the holds the brioche in such high regard.   The dog can sniff a brioche coming out of the oven from the bottom of the garden.  It must be the buttery smell because it drives him mad.  It seems he will do anything for a small piece.  He takes his nagging and begging to new levels to secure a few crumbs.    I am shall be testing his strong need and desire for brioche when we next visit the vet by having a small piece in my pocket.  Hopefully we can avoid the usual practice of his command performance of high drama and an unwillingness to even cross the threshold.  It will be interesting to see just how much he really does love his brioche!

photo(117)

It took me several attempts to master the brioche recipe because the dough is so much stickier and more fluid than other yeast breads.  On my first attempt I made one large brioche, what I didn’t quite realise was that the brioche rises quite a bit in the oven.  So when I opened the oven door towards the end of the cooking time I was horrified to see that the brioche had not only hit the roof of the oven but having no where else to go started to expand alarmingly in a sideways direction, and not in a good way.

I have also tried different flours.   At the beginning I used a strong white flour which for my taste didn’t quite give that soft cakey texture.  I then switched to plain flour which gave a much better taste and texture but it was the 00 plain flour which worked best for me.  I also had a little guilt over the six eggs and 350 grams of butter which seemed on the extravagant side but once tasted I don’t think I would want to change the recipe.  The rich buttery taste and luxurious yellow crumb can only come from the eggs and butter.  The brioche takes time to make so why cut corners?

Like a lot of fresh yeast breads the brioche only seems to be at its best for a very short period, maybe two days but that isn’t a problem because it freezes very well.  I tend to bake two at a time, one to be eaten straight away and the other to be sliced and frozen and used later in a bead and butter pudding or toasted with some jam.

The brioche is also different in that it needs three rises the second rise being overnight in the fridge or a very cool place.  The three rises mean that there is less yeast in the recipe and so the proving may take a little longer but this only helps to improve the flavour and create an even texture.  Leaving the dough in the fridge or a very cool place helps to make it much more manageable to handle and shape.

I have read many recipes for brioche and often they differ in oven temperatures and time.  For my oven I have found that I get the best results from using two 16cm tins rather the one 22cm tin.   I set the oven high for the beginning of the bake and then turn it down to finish the baking.  Again, you cannot  judge whether it is done just by looking, as the egg wash browns and gives the impression that it is cooked when it is not.  The only answer is the skewer test – if it comes out clean then its done.

Brioche

Ingredients

15g fresh yeast

70 ml lukewarm milk – the warm milk will start to activate the yeast

500g plain 00 flour or strong white flour if you prefer

15g salt

6 eggs beaten lightly

30g caster sugar

350g butter softened

30g caster sugar

1 egg yolk for brushing mixed with a little milk

Method

Heat the milk very briefly in the microwave, test to make sure it is only lukewarm.  Add the yeast and stir to dissolve.

Put the flour, salt and eggs in a mixing bowl using a dough hook.  Add the yeast and milk mixture.

On minimum speed mix the ingredients until they are well combined.

Turn the speed up and knead for approx 10 minutes,  stopping the machine every now and then to scrape down any loose bits.  By the end of the 10 minutes the dough will have become firmer and you will notice it become elastic against the sides of the bowl.  The dough is still very sticky and difficult to handle.  Do not be tempted to add any more flour.

Add together the sugar with some of the softened butter.  With the mixer on slow start to add small spoonfuls of the butter and sugar mixture, wait until combined before added the next.  Continue with the remaining butter.  When all the butter has been used up turn the mixer onto a medium speed and knead for another 10 minutes.  The dough will become beautifully silky and shiny.  You will also notice the dough will make a slapping noise against the side of the mixer bowl.

Remove dough hook, cover dough with clingfilm and leave to rise to double in size.  This will take 2-3 hours, don’t be alarmed if after the first hour there isn’t a lot of progress.  As there is less yeast it will take longer.

When the dough has doubled in size it needs knocking back  – at this stage I use my hands to turn it over a couple of times, knocking out the air.

Cover the dough again and place in a very cool place or the fridge for 6-8 hours.  I usually make the dough up in the evening and return to it in the morning.

When you turn the dough out you will find it quite stiff and very easy to use.  The dough now needs to be divided into two balls.  One ball of 2/3rds and the other of the remaining 1/3rd.

I like to melt a little butter in the microwave and brush the brioche tin thoroughly before putting the larger of the balls into it.  Once in, create a hole in the centre with your fingers.  With the smaller ball roll it into a tear shape.  With the larger end at the top push the smaller ball into the centre of the hole and with your fingers make sure you press it well into the large ball.

Brush lightly with the egg wash, being carefully not to let any wash collect around the join of the small ball on the top or around the edge of the fluted tin as this will hamper the dough rising in the oven.

Leave it to rise in a warm place until it has reached nearly the top of the tin.

Preheat your oven to 200C/400F/Gas mark 6.

Before putting in the oven, gently brush the brioche again with the egg wash.  You can at this stage use a pair of scissors or sharp knife to cut 6 diagonal slashes into the main ball, leaving the top ball intact.  Dipping the scissors or knife into cold water between slashes helps them not to stick to the dough.

Place in the oven, allowing space for the brioche to rise taking into account the top ball.

Bake for 15 minutes and then turn down the oven to 170C/325F/Gas mark 3 for a further 30/40 minutes.

The only way to really test whether the brioche is cooked is to insert a skewer into the centre.  If it comes out clean then its cooked otherwise leave in the oven for another 5 minutes and test again.

Once cooked take out of the oven and leave in its tin to cool for 10/20 minutes then turn out onto a wire rack.

Read Full Post »

cheeseandwalnutloaf

I used to make this tea bread without thinking, well, maybe a little bit of thinking was involved but it was a really easy recipe to make, we had it so often it became ordinary and unexciting so I stopped making it and the recipe was forgotten in a drawer and left to gather dust.

When I was going through the kitchen drawer this week I found my little paperback notebook – it is scribbled on and worn but inside is a world of lost recipes carefully handwritten some twenty five years ago. Some of the recipes are just scraps of paper with recipes written on which have been glued in and others are tinted with stains of food long eaten. I can remember a time when I was lost without this little book, it held my culinary world in its grasp.  All the recipes in that little note-book were collected from friends and family, their mothers and grandmothers – some of them were not that easy to obtain and one or two of them I suspect are not complete, they are missing that little extra ingredient,  having the reputation of making the best lemon cake in the village was something to aspire to – you weren’t going to throw that away lightly. When I was a small child, I often overheard many times ‘she makes the most marvelous sausage rolls, but she won’t give the recipe away’ to a gaggle of disapproval and an intake of breaths. How times have changed; a computer and access to the internet reveals all.

Cheese & Walnut Tea Bread

Ingredients

225g/8 oz Wholemeal Flour

2 tsp baking powder

1 tsp celery salt

1/2 tsp mustard powder

50g/2 oz butter diced

110g/4 oz cheddar cheese grated

25g/1 oz shelled walnuts chopped

142ml/1/4 pint milk

1 egg beaten

1 lb loaf tin – lined with greaseproof paper

Turn oven to gas mark 4/180C/350F.

Method

Mix flour, baking powder, salt and mustard in a large bowl.  Add butter and rub it in between your fingers until it resembles fine breadcrumbs (being lazy I put it in the food processor and whizzed for about a minute).

Stir in cheese and walnuts and then mix in milk and egg to make a soft dough.

Turn the dough into the loaf tin, level the surface and make a slight hollow in the centre.

Bake for 40-45 mins till golden brown. (I baked mine for 50 mins which I believe is down to my oven).

Take out and cool. When cool slice.  My preferred way of eating this is to spread a thick slice liberally with butter. This isn’t a moist tea bread.  It has a more wholemeal texture, but the smell and taste  is lovely and morish.

Read Full Post »

Gâteau Breton

Gâteau Breton

Having an exceptional cook as a friend, who is also generous with her recipes is a rare thing.  I did have an Italian friend whose mother produced the most wonderful food but getting a particular recipe however hard I tried came to nothing.  Even my own mother in law was furious when once at a Burns evening, I complimented her on her swedes and asked what she had put in them, my father in law, quick as a flash replied a spoonful of sugar, ignoring her cry of protest.  An icy presence over the meal followed, but I didn’t care – I had the secret ingredient!   Recipes are tricky things, so many times I have come home and made ‘the recipe’ only to find it didn’t quite turn out as it should.  The mock surprise look at the recipe owner usually tells me what I need to know – their ingredient ‘x’ is missing from the recipe.

Still, it hasn’t put me off – I still ask.  Luckily for me I met someone several years ago who came from Brittany, France.  She was very proud of her heritage and the food of Brittany and very generous in passing on her recipes, her attitude was that by passing them on they continue to live.   I have several of her recipes, which have turned out just as she had made them and how I had remembered enjoying them.

Gâteau Breton is difficult to describe, as it is a cake and not a cake.  It is a cross between buttery shortbread and Madeira cake.  One of the joys of baking this gâteau is that it fills the house with the most wonderful buttery smell whilst it is in the oven.

Gâteau Breton

Ingredients

225g/8 oz plain flour  (I use 00 flour)

225g/8 oz caster sugar

225g/8 oz unsalted butter softened

6 egg yolks

Oven 350/180/Gas 4

IGâteau Breton mixture

Add the softened butter and caster sugar together in a bowl and mix until light and fluffy.

Add the 5 egg yolks, a yolk at the time (I break the sixth egg yolk and put half in the gâteau at this stage and save half for the glazing as a whole yolk is far too much)  Mixing until combined.

Add the flour but not all at once. Keep adding flour until all have been combined. The mixture at this stage will be quite stiff.

Put the mixture into a loose 8” bottom cake tin or spring form tin.  With a knife evenly distribute the mixture and put into the fridge for 30 minutes.  This will allow the mixture to stiffen further.

After 30 minutes remove from the fridge and again with a palate knife smooth the top of the gâteau and coat with the remaining egg yolk.  Taking a fork, drag across the gâteau to create the criss cross lines decoration.

Bake in the oven and carefully check after 30 minutes that the top has not browned too much, if it is browning too quickly, cover for the rest of the cooking time.  To check that the gâteau is cooked press your finger gently in the centre, it should be firm with a slight bounce.

Leave the gâteau in the tin until it is cool.

Once cool it should be kept in a airtight container.

It is perfect cut up into triangles and served with coffee.

gateau breton 2

Read Full Post »

walnut and coffee spong cake

In my house we tend to go through cooking phases of loving a particular recipe, be it cake, a pasta dish or a way I cook the vegetables.  Then all of a sudden I will not want to eat it again.  This can last for months if not years.  The poor coffee and walnut sponge cake has been victim to one of these phases.  It was when I was trying to build up some inspiration by looking at my larder shelves of what to bake when I saw a packet of walnuts.  I realised I haven’t baked a coffee and walnut cake for ages.

When I was a child and taken out for afternoon tea the coffee and walnut cake was an indulgence, the height of sophistication and the only way I was ever going to get a taste of coffee.  There were some very strict and strange rules when I was growing up and one of them was that I was not allowed to drink coffee, not until I reached the age of 18.  I don’t know the reason, and I never asked but the thought of having the forbidden coffee and walnut cake every now and then was enough to keep me quiet.

Coffee & Walnut Sponge Cake with Coffee Butter Icing

Ingredients

150g/ 6 oz butter softened

150g/ 6 oz caster sugar

3 eggs beaten

150g/ 6 oz self raising flour

40g/ 1 ½ oz walnuts finely chopped

  1. Turn oven to 350F/180C or Gas Mark 4.
  2. Whisk the butter and sugar until pale in colour.  Add the eggs a little at a time.  If the mixture begins to curdle add a tablespoon of the weighed flour.
  3. Fold the chopped walnuts into the mixture.
  4. Gently fold in the remaining flour.
  5. Transfer into three cake tins (or two tins if you want just a two layer sponge cake) and bake in the centre of the oven for 25/30 mins until risen and sponge has just left the sides of the cake tin.  A final test would be to gently push your finger into the middle of the cake, if it springs back it’s done.  Leave in the tin for a few minutes and then turn out onto a wire rack to cool with the top of the cake facing upwards.  Otherwise as the cake cools the wire rack will leave an impression on the sponges.

Coffee Butter Icing

Ingredients

100g/ 4 oz butter softened

225g/ 8 oz icing sugar

3 tbsp cold milk

4 tsp coffee granules

  1. Mix the coffee with the milk and stir until it has dissolved.
  2. In a bowl add all the ingredients and blend with a food mixer on the slowest speed to begin with otherwise there will be icing sugar everywhere.  As the mixture starts to blend turn the speed up and continue mixing until you have a smooth thick cream.

To make up the cake

Make a decision as to which sponge has the best looking top, save this for the top layer.   If one of the cakes has broken, don’t worry use it for the bottom layer.  Divide the butter cream in half, spreading the bottom sponge layer with one half and then placing second sponge on top.  Spread the remaining buttercream and top with last layer and dust with icing sugar and store in an airtight tin.

Read Full Post »

Older Posts »

%d bloggers like this: