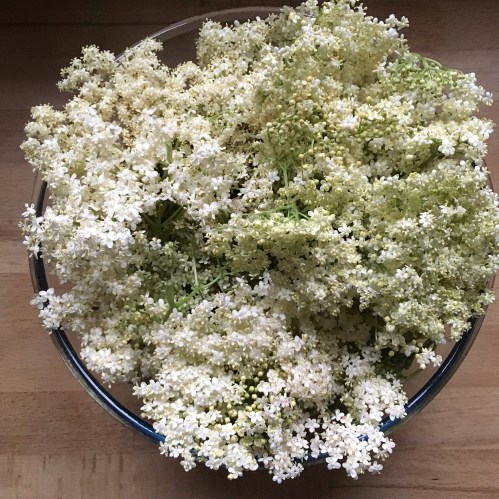
 Usually in the middle of May, shortly after the May tree flowers, the elder tree will start to appear with large heads of creamy white froth. A signal that summer is nearly here. This year the weather has been awful and the seasons a little muddled. The elderflowers have been late. I have had to take several extra walks to check on progress. Then over a few days of sunshine small white buds started to appear and not long afterwards froths of flowers could be seen.
Walk anywhere in the English countryside and it won’t be long before you walk past a tree full of the creamy frothy flower heads with the most heavenly fragrance. These flower heads can lend themselves to many recipes, dripped and fried as fritters, made into a cordial, mixed into cakes but the most luxurious thing has to be Elderflower Champagne. What ever is made with the flowers the house will be filled with a sweet summery scent.
As tempting as it is to strip the first tree of all its reachable flower heads it is better to take a few of the best heads and move onto another tree. This allows for berries to mature later in the year, not only for further recipes but also for the birds.
Elderflower champagne is easy to make and uses very few ingredients. The taste is floral but in a subtle way. Please do read the notes below the recipe, as they are quite important if you are thinking of making this. I don’t want to come across as off putting in making this but, I learned new respect for its powers, when my brother managed to blow the fridge door off many years ago! Luckily I wasn’t living with him so was unavailable for any clearing up duty but he wasn’t allowed to make any more.
Elderflower Champagne
Makes 12 litres
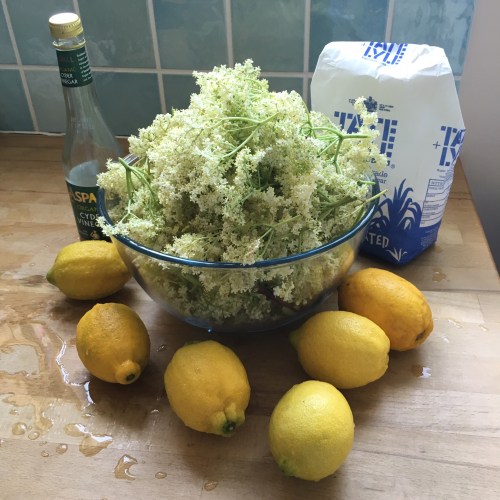
40-45 Elderflower heads
5 Tablespoons cider vinegar
6 Unwaxed lemons
8 Pints boiling water
16 Pints cold water
1.5 kgs granulated sugar
6 x 2 litre plastic fizz bottles (cheap lemonade bottles are good)
A large bucket
Method
Pick the elderflowers when they are dry, preferably on a sunny afternoon when the dew has been dried off. Look for the newly opened flowers, not any that are brown or petal dropping.
Remove the stalks, any brown flowers and any small bugs. Set to one side.
Put boiled water in a bucket (a fermenting bucket is well worth the investment), add the sugar to this and stir until dissolved. Add the cold water, stir. Allow to cool to no hotter than blood temperature.
Whilst the water is cooling prepare the lemons. Remove the zest and extract the juice. The pith is unwanted as it can cause the elderflower to have a bitter taste.
When the water has cooled add the lemon juice, the lemon zest and the vinegar. Stir well. Add the elderflowers and stir gently making sure they are fully immersed in the liquid. Cover and leave for 5 days. If using a fermenting bucket, make sure the lid is not completely sealed down as you need to allow for any gases to escape. If no lid is available a tea towel or towel can be used.
After 5 days there should be some evidence of activity. This is in the form of bubbles and or foamy mould sitting on the top. Lack of either of these does not necessarily mean that no fermentation has taken place. To double-check this, I strain the liquid through a muslin cloth into 4 demijohns fitted with an air lock (just over half filling them to allow for any excess activity). After thirty minutes the air locks started to bubble indicating fermentation was under way.

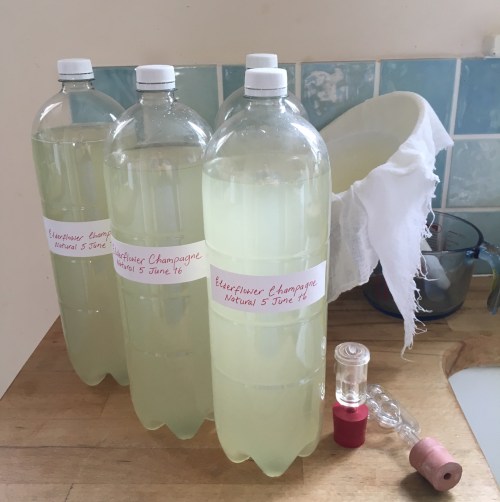
Allow to settle. Siphon the liquid into bottles leaving a generous gap at the top. Seal and leave to ferment further.
During this time the gas will build up in the bottles and this gas will occasionally need to be released to prevent excess pressure. The sugar is being used up in the fermentation process and so the champagne will decrease in sweetest and become drier but also more alcoholic. Please read further notes below.
The champagne should be ready to drink after about 7 days in the bottle. As time goes on the fermentation process continues until all the sugar gets used up and it becomes unpleasant and past its best. To slow the process down put the bottles somewhere dark and cool.
The bottles are designed so that when too much pressure builds up the indentations at the bottom of the bottle will pop out and make the bottle tip over, this is the signal to release some of the pressure by opening the cap to allow some of the gas to escape.
NOTES
Picking
Elderflowers are best picked on a dry day, preferably a sunny afternoon. Do not pick from the side of a road because the passing cars will have affected the flowers. Also try not to pick any flowers at dog height!
Bottles
I have used plastic fizz bottles for one very good reason; they are manufactured to withstand high pressure. As the elderflower champagne ferments in the bottles there is a build up of gas. By squeezing the bottles the amount of gas can be judged easily. At this stage excess gas can be released when needed by twisting the cap part way until a hiss is heard. Lastly if any of the above signs of pressure build up are missed the design of the bottom of the bottle will pop out making them topple over and warn you before they explode.
Glass bottles with swing lids are temptingly attractive but come with hidden dangers. There are several clips on Youtube of the force that these can explode from pressure. The aftermath of clearing up broken glass and sticky liquid is no fun. The other problem with the swing lid is that it doesn’t allow for easy opening and closing releasing excess pressure – its all or nothing rather than controlled.
Natural Yeast
The idea behind this recipe is to use natural yeast found on the elderflower heads. Natural yeast is unpredictable; sometimes there will be none present. It’s strength is also unpredictable. If fermentation does not occur naturally then a sachet of sparkling wine yeast can be added to get it started. To do this, mix the sachet with 100ml warm water to which 2 teaspoons of sugar have been added. When it becomes frothy add to the elderflower liquid.
Blackening
Some recipes call for you to add boiling water to the elderflowers. In my experience this always causes them to discolour and go black immediately – and this ruins the batch. I have found that the answer is firstly to allow the water to cool sufficiently and secondly to acidify the water (with the lemon juice and vinegar) before adding the elderflowers.
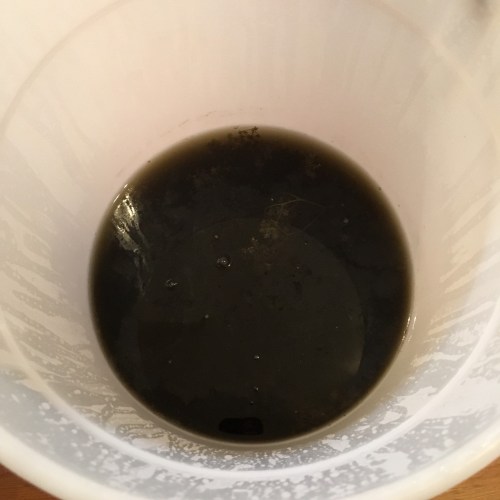
This is what happens if you add boiling water to the elderflowers or elderflowers to boiling water.
Fermentation.
The process involved is a natural and ancient one. Yeast reacts with sugar to produce alcohol and carbon dioxide (and a small amount of sediment). The carbon dioxide gas is released to the air in the initial stages of fermentation. After the liquid has been bottled the fermentation process continues but this time the gas is trapped in the bottle. The gas exists partially dissolved in the liquid and partly in the space at the top of the bottle. On releasing the pressure the gas escapes from the liquid, which causes the bubble effect but can cause a volcanic reaction if too high a pressure is allowed to build up. The fermentation process will come to an end either when all the available sugar has been used up or if the alcohol level reaches higher than the yeast can tolerate (commercial yeasts are selected to withstand a higher alcohol limit).
Champagne
True Champagne comes only from the Champagne region of France. My elderflower “champagne” is not true Champagne (obviously) but is still great for a summer celebration!


